Machines ordered with Loading Elevators are fitted out in the factory but partly dismantled for ease of transport. Separate fitting instructions are provided to allow the elevator to be reassembled.
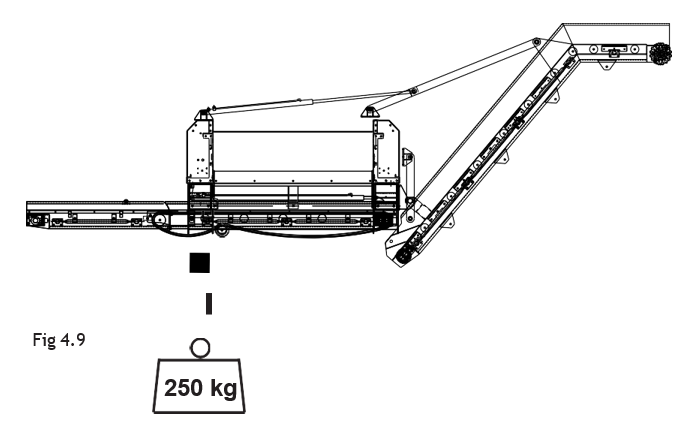
Important - The weight of the Loading Elevator must be balanced by attaching a counterweight of 250 kgs approximately, to the Left hand side of the machine.
The customer is solely responsible for providing this counterweight which is necessary to provide stability when the machine is in operation. See Fig 4.9.
Note: Disconnect the solenoid plugs for Rear Lift and Levelling services (2 black plugs and 2 white plugs), see Fig 4.8). These plugs must be
removed from the solenoids prior to operating the elevator in order to disable lift and levelling functions.
Failure to disconnect plugs may result in toppling over of the machine in certain conditions.
• Connect the Elevator hoses to the tractor Auxiliary Hydraulic Manifold.
• With the Diverter Valve lever in the IN position use the Right Hand Joystick to lower the Cross Conveyor to the horizontal position.
• Move the Conveyor to Right until fully out.
• Pull the Diverter Valve lever OUT to re-direct oil from the Conveyor to the Loading Elevator.
• Activate the Tractor Auxiliary Hydraulics flow control valve to lower the Loading Elevator into the working position.
The elevator is now ready for use.
Having previously disconnected the Rear lift and Levelling solenoid plugs these functions are now inactive and inadvertant operation of the control panel joystick and pushbutton will have no effect on the operation of the machine.
Machines after 2018
Step 1
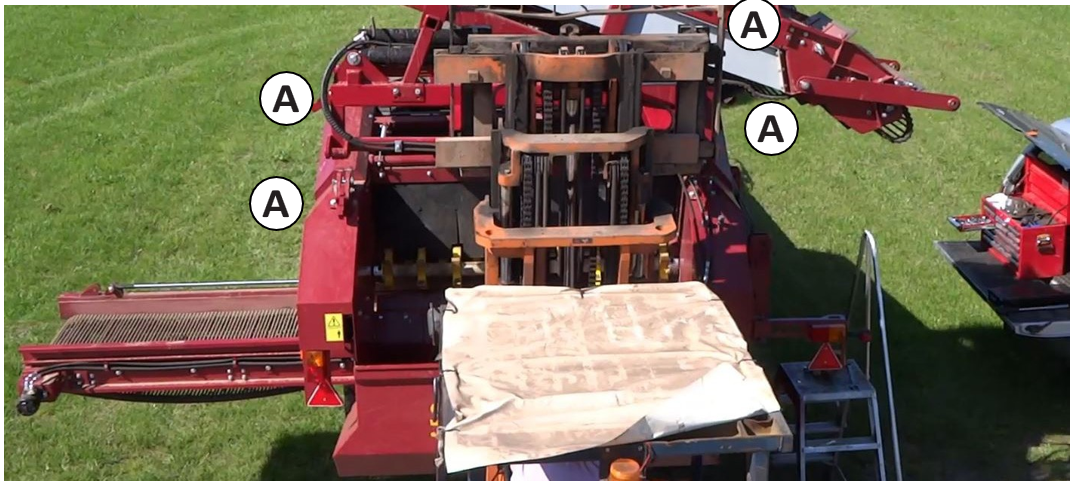
Use a forklift to lift elevator onto machine. To ensure stability, make sure to utilise the fork inserts underneath the elevator. Navigate the elevator towards the 4 latches (A) already fixed on machine prepared for elevators.
Step 2
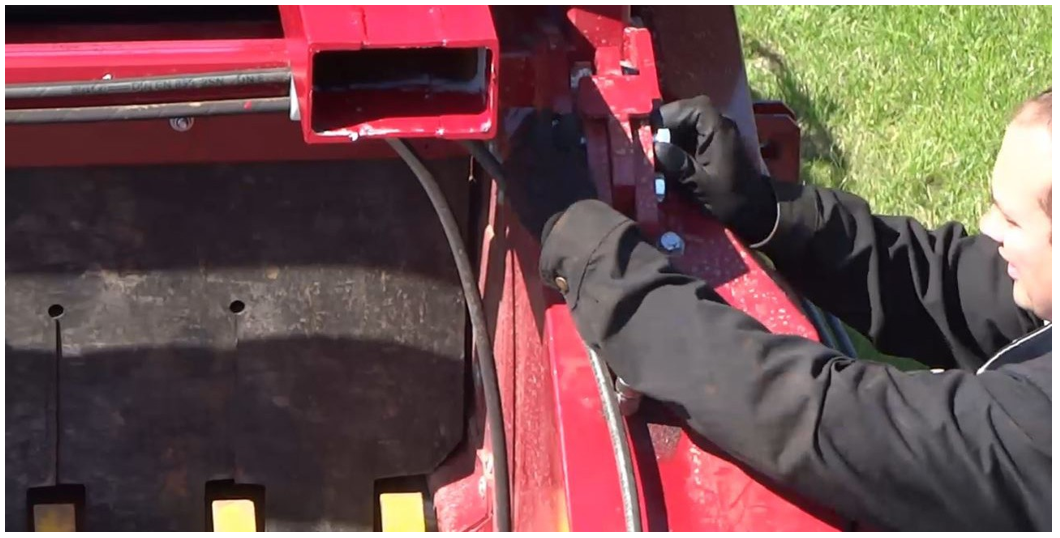
Connect and fasten the 4 quick release latches, using a tightening gun.
Step 3
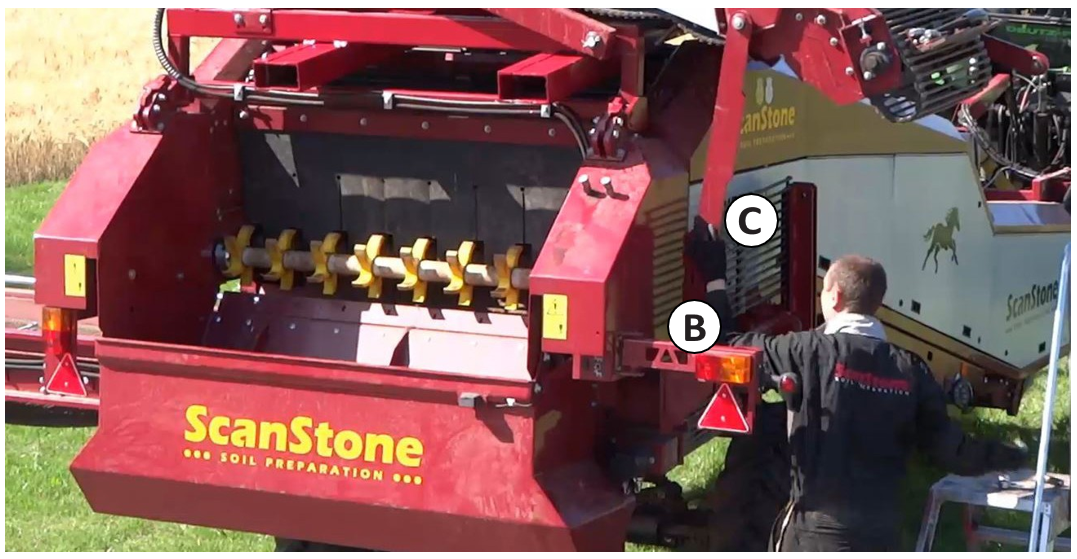
Connect the 2 drop links (B) to machine, fasten and tighten bolts. Make sure guard protector is in place (C)
Step 4
Connect the two hydraulic hoses for the motor, located on the back. Make sure flow and return hoses are connected appropriately (colour-coded).
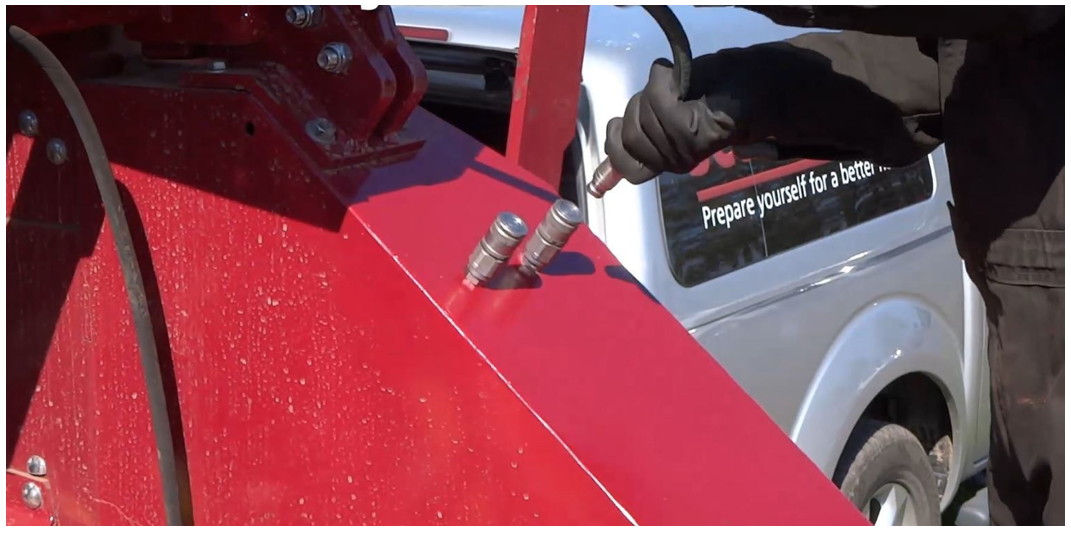
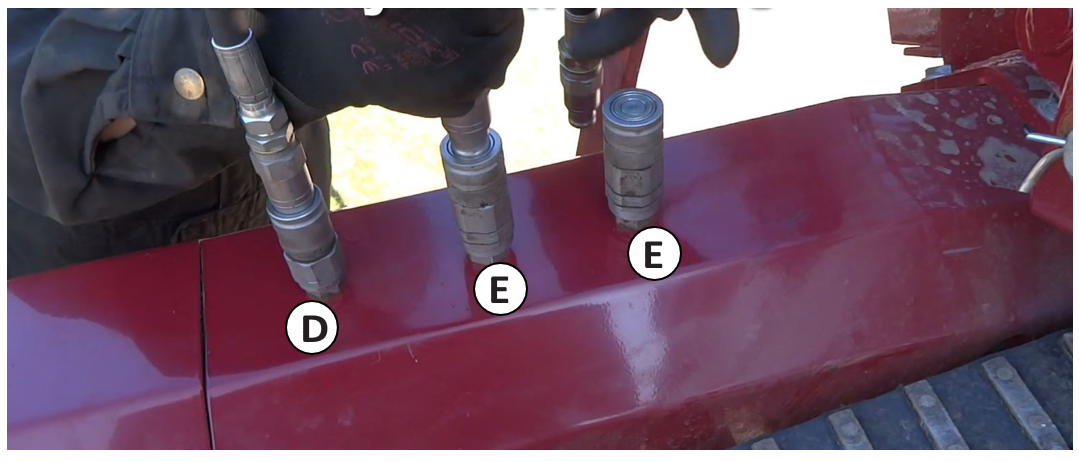
Step 5
Connect the three hoses for the gooseneck (D) and main elevator (E) The gooseneck is flow only.
The main elevator is flow and return. Make sure the hoses are correctly connected.
Step 6
Make sure cross conveyor is all the way to the left, as shown below. Follow the instructions in Section 6.4 of the control box operations. Make sure the rear lift is fully lowered.
Once the elevator is connected:
MAIN MENU > SETTINGS > ELEVATOR > CONNECT
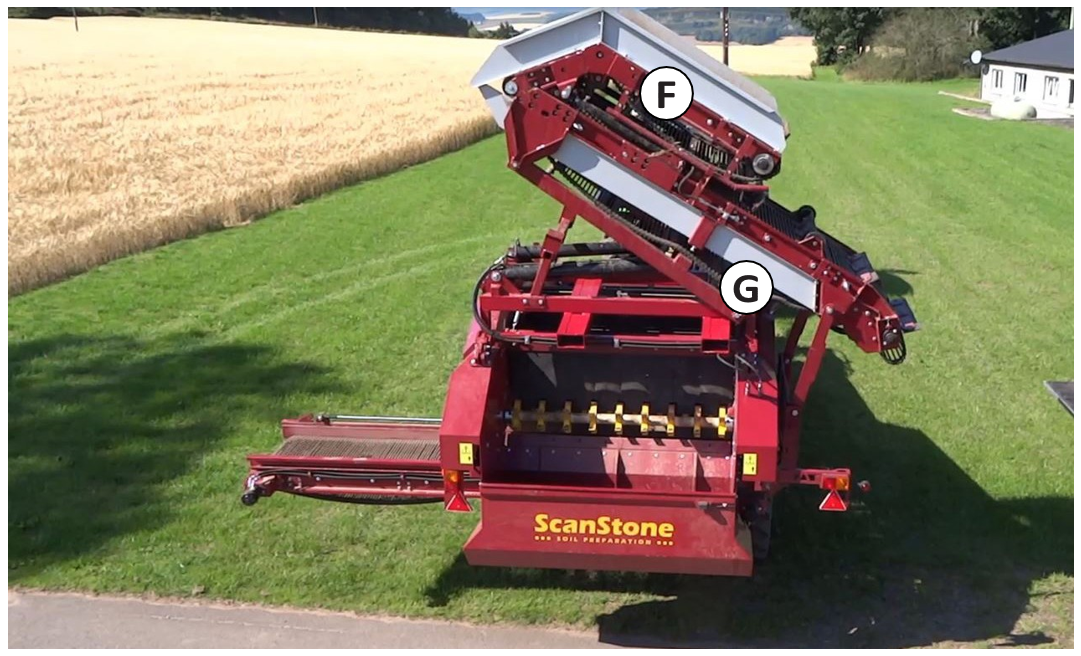
the third joystick which normally controls the cross conveyor, will now control the elevator’s gooseneck (F)
The main part of the elevator (G) is controlled by the soft keys on the second page of Main Operations. (Section 7.2)
IMPORTANT - The main part of the elevator MUST be unfolded before the gooseneck is unfolded.
Step 7
Once the main part of the elevator is extended, the gooseneck can be extended.
Step 8
When folding for road transport, ensure that the gooseneck elevator is folded BEFORE folding the main part of the elevator is folded.
Once the elevator is back in transport position (as in Step 6), use the cross conveyor switch at the rear of the machine to move the cross conveyor to the right, while pulling down the transport lock lever, so that cross conveyor folds up. The machine can now be transported on the road.